
Rock Garden Design: How to Do Stone Right
The difference between a rock garden and a pile of rocks is design. Placement, scale, and planting — here's how to make stone look like it grew there.
Rock gardens fail one way: the rocks look placed instead of discovered. Get the stone right and everything else — the planting, the paths, the whole yard — reads intentional. Get it wrong and no amount of flowers rescues it. Here's how designers make stone look like it grew there.
Rule 1: Bury your boulders
The single biggest tell of an amateur rock garden is boulders sitting on the ground like dropped marbles. Natural rock emerges from the earth. Bury every boulder by a third to a half, widest face down, and tilt it slightly back into the grade. Yes, it hurts to pay for stone you then bury. That's what makes it look real.
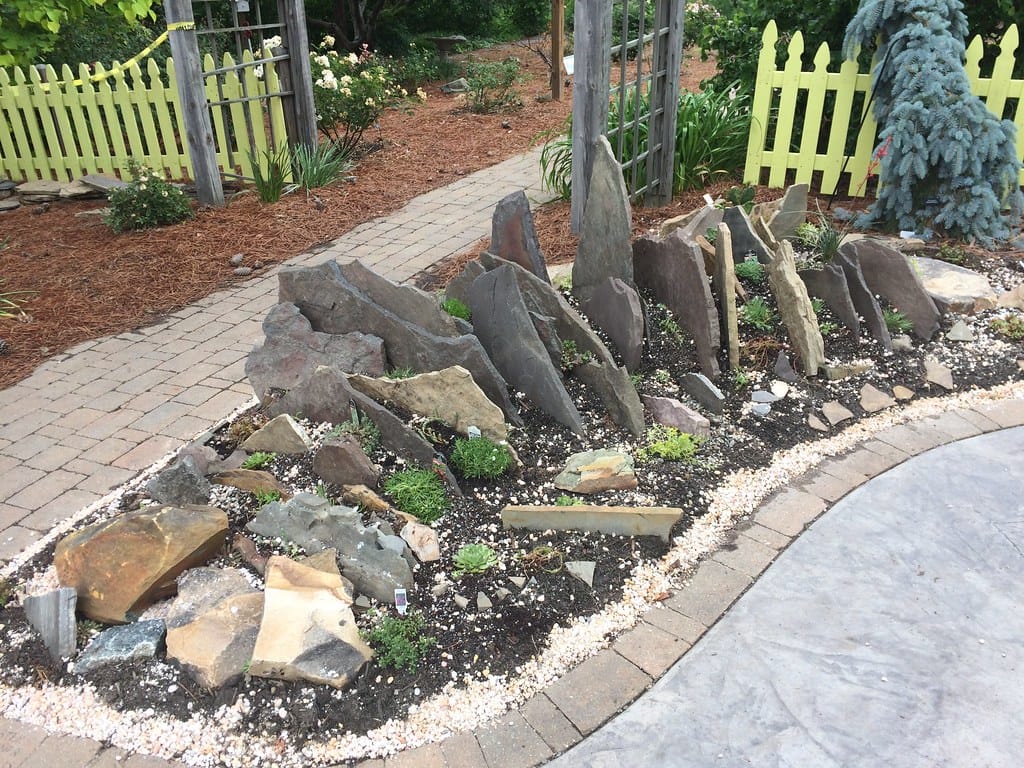
Rule 2: One stone type, a few big rocks
Nature doesn't mix granite, sandstone, and lava rock in one outcrop — don't either. Choose one stone that occurs in your region and stick to it. And favor fewer, larger rocks over many small ones: three big boulders grouped in odd numbers beat thirty softball-sized stones scattered everywhere. Group them like natural outcrops, with the strata lines running the same direction.
Rule 3: Design the voids
The planting pockets between stones are the actual garden. Vary them: deep pockets for anchor plants, crevices for alpines, gravel flats for spreaders. South faces of boulders create hot microclimates for heat-lovers; north faces stay cool and moist for columbine and fescue. One rock group is several microclimates — use them all.
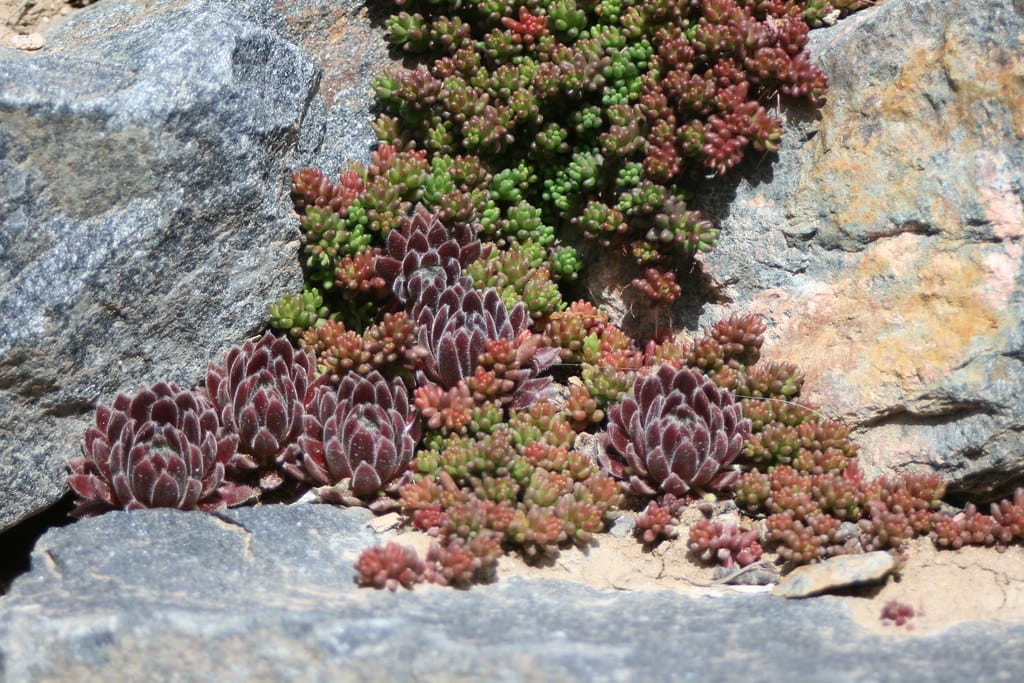
The planting palette
Rock gardens want plants that echo mountain and steppe: mostly low, mounding, and tough.
- Carpets: ice plant, creeping phlox, sulphur buckwheat, veronica 'Turkish Carpet.'
- Crevice specialists: hens-and-chicks, sedums, dianthus, saxifrage.
- Sculptural accents: dwarf conifers (mugo, bird's nest spruce), yucca, cold-hardy cactus.
- Softeners: blue oat grass, prairie dropseed, and other fine-textured grasses so the composition moves.
- Seasonal color: penstemon, basket-of-gold, dwarf catmint — the usual dry-garden heroes in their compact forms.
Plant tight against the stone — plants hugging rock look established; plants floating in mulch look new forever.

Drainage: the invisible ingredient
Classic rock garden plants are mountain plants, and mountains drain. If you're on clay, build up: mound gravelly soil 12–18 inches and set your stones into the mound. A gravel mulch top layer keeps crowns dry and completes the look — wood mulch is wrong here.
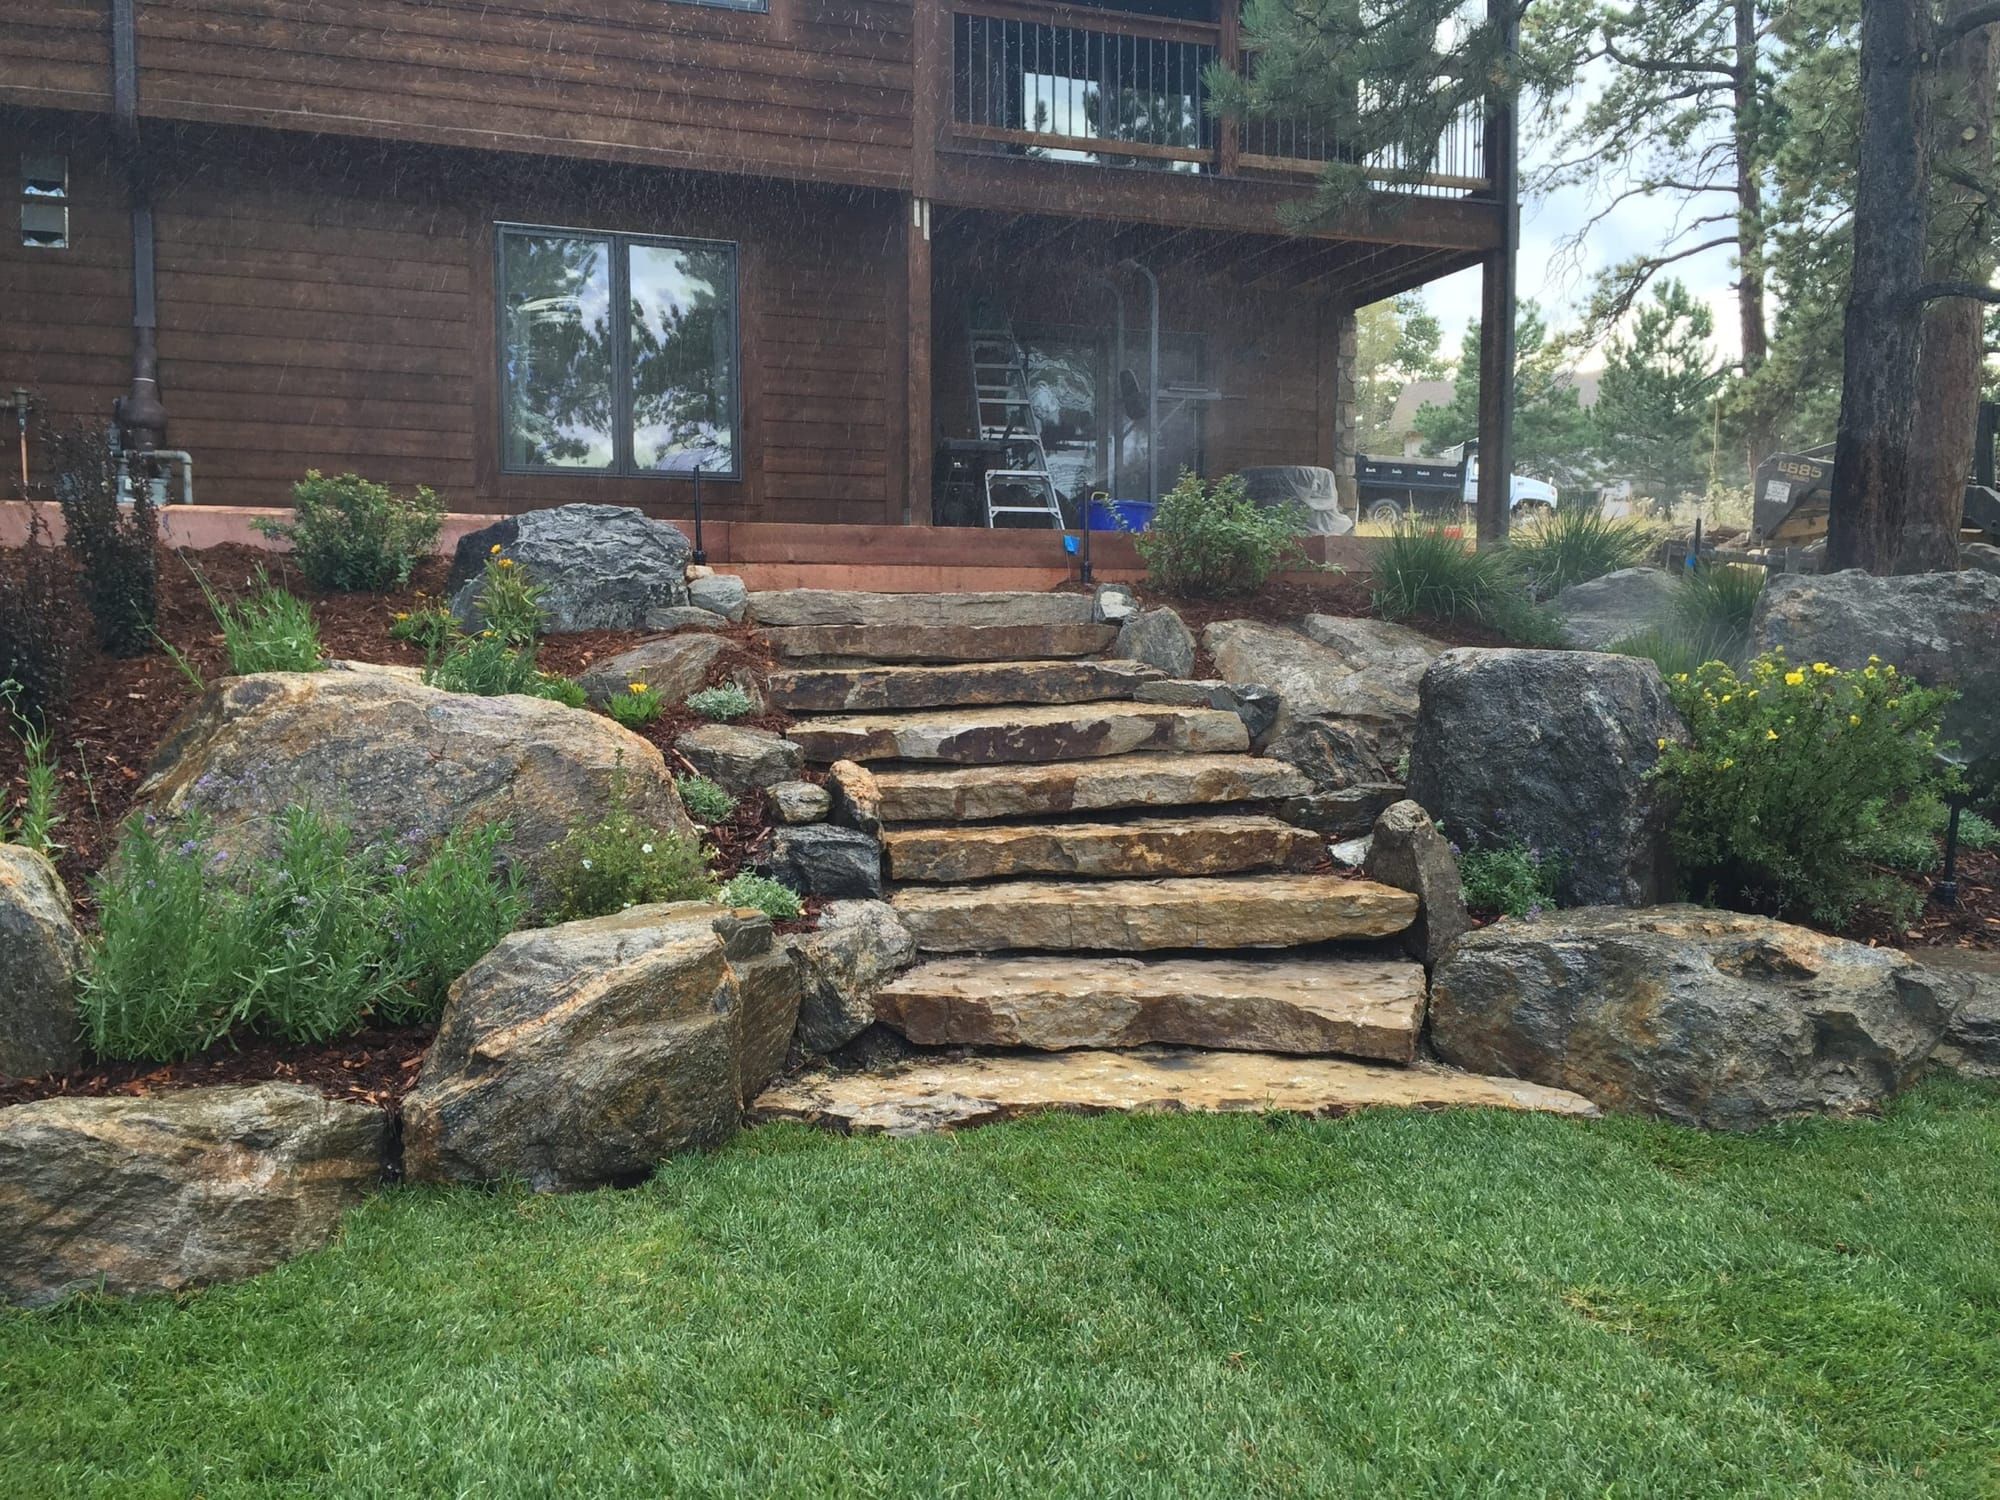
Steps, paths, and function
The best rock gardens work for a living: boulder steps up a slope, a flagstone path through the planting, a sitting rock positioned where the view is. If your yard has a grade change, that's not a problem to fix — it's the rock garden begging to happen. (Slopes have their own guide: xeriscaping a slope.)
Getting started
Sketch the outcrop, source local stone in mixed sizes (bigger than feels comfortable), set and bury the three largest first, then build pockets and plant. The broader build order lives in 10 Steps to Xeriscaping — and for the full gallery of what's possible, browse xeriscape ideas & inspiration.